ROS2 相机内参标定 realsense
目录
1 安装环境
sudo apt install ros-humble-camera-calibration1.1 启动相机和标定
ros2 launch realsense2_camera rs_launch.py(1)--size 9x6: 为当前标定板的大小(棋盘格是内部小正方形角点的交点!)
(2)--square 0.026:为每个小棋盘格的边长,单位是米
(3)image:=/camera/image_raw:标定当前订阅图像来源自名为/camera/image_raw的topic (4)camera:=/camera:为摄像机名
ros2 run camera_calibration cameracalibrator --size 11x8 --square 0.02 --ros-args --remap image:=/camera/color/image_raw --remap camera:=/camera
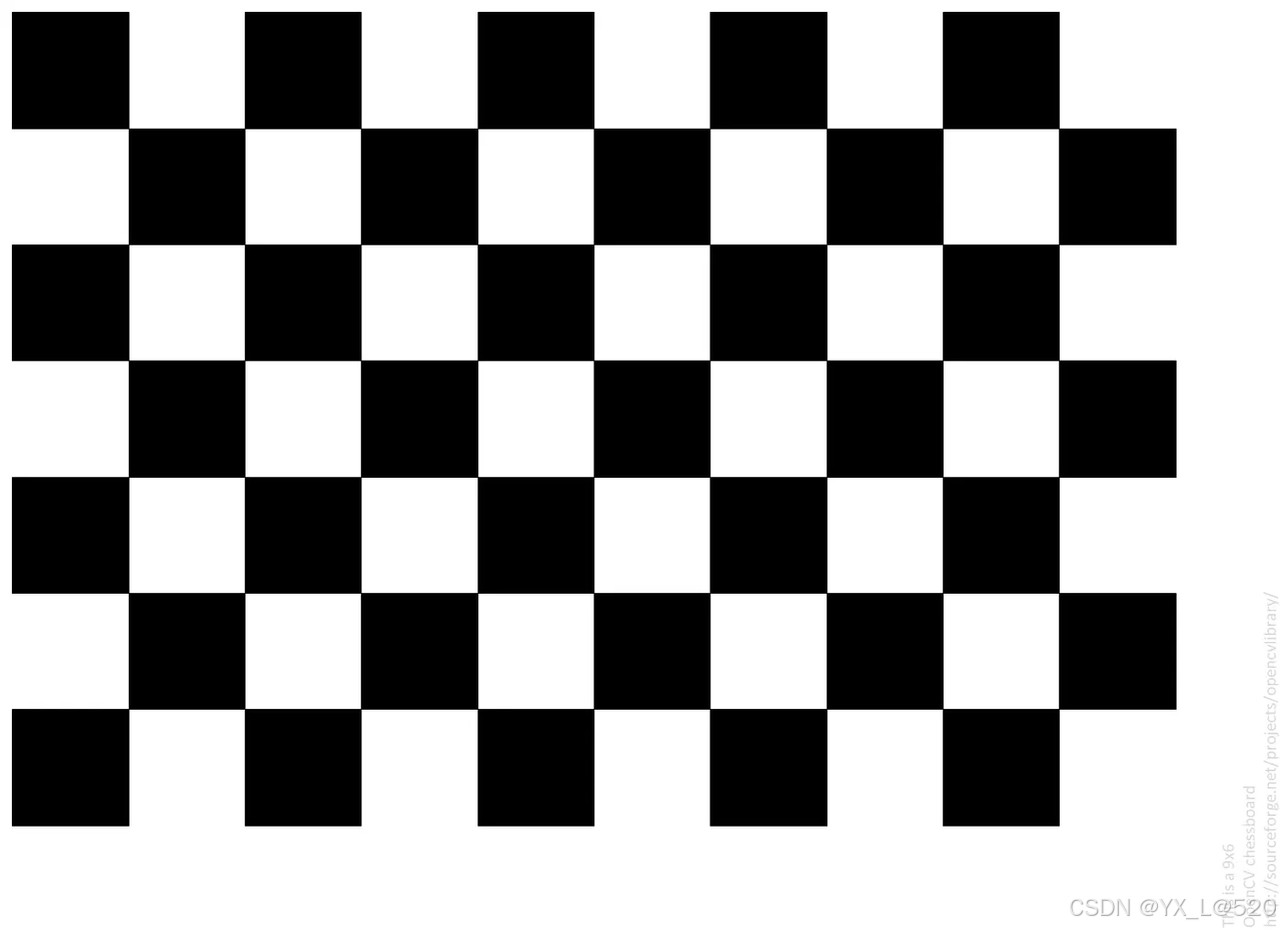
9*6内角点棋盘格,格子大小为26mm:
ros2 run camera_calibration cameracalibrator --size 9x6 --square 0.026 --ros-args --remap image:=/camera/color/image_raw --remap camera:=/camera2 准备棋盘格
2.1 打印一张棋盘格图片
可以从这里获取 ,下面给出opencv官网给出的一张9*6内角点棋盘格,格子大小为26mm:
2.2 具体标定过程
8x6和0.108是官方给出的标定板的尺寸,请根据自己的修改比如我的是8x6和0.0216(参考)
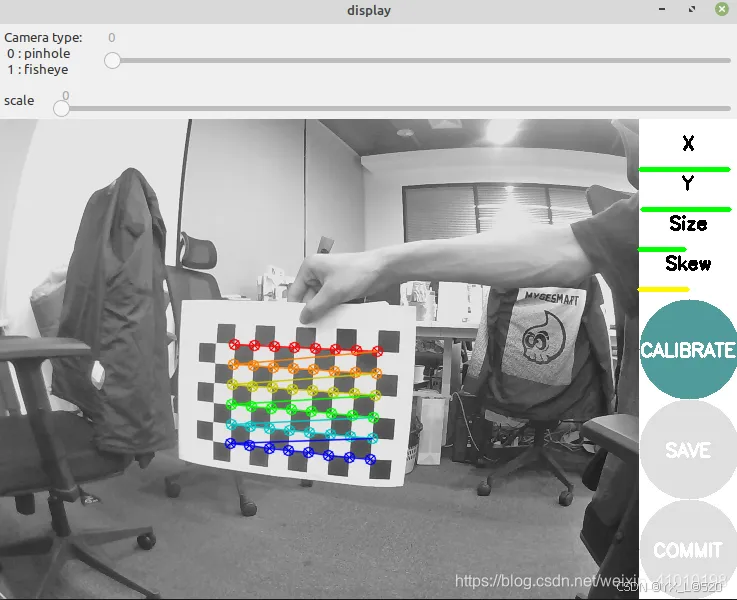
为了得到一个好的标定结果,应该使得标定板尽量出现在摄像头视野的各个位置里:
如标定板出现在视野中的左边,右边,上边和下边,标定板既有倾斜的,也有水平的.所以多动一动~
界面中的
x:表示标定板在视野中的左右位置。
y:表示标定板在视野中的上下位置。
size:标定板在占视野的尺寸大小,也可以理解为标定板离摄像头的远近。
skew:标定板在视野中的倾斜位置。
因此,需要移动标定板:x代表左右移动,y代表上下移动,size代表远近移动,skew代表倾斜侧角,可以上下倾,也可以左右倾。
1、通过不停的移动标定板:直到X、Y、Size、Skew四个都变成绿色
2、当四个都变绿色时,下面的三个按钮也会变成青色,此时点击CALIBRATE开始标定,过程大约1,2分钟
当开始标定后,可以在终端中看到看到标定的信息:
*** Added sample 1, p_x = 0.533, p_y = 0.686, p_size = 0.443, skew = 0.007
*** Added sample 2, p_x = 0.432, p_y = 0.588, p_size = 0.442, skew = 0.022
*** Added sample 3, p_x = 0.411, p_y = 0.771, p_size = 0.446, skew = 0.000
*** Added sample 4, p_x = 0.417, p_y = 0.979, p_size = 0.446, skew = 0.004
*** Added sample 5, p_x = 0.446, p_y = 0.362, p_size = 0.437, skew = 0.020
*** Added sample 6, p_x = 0.451, p_y = 0.162, p_size = 0.438, skew = 0.013
*** Added sample 7, p_x = 0.472, p_y = 0.530, p_size = 0.340, skew = 0.033
*** Added sample 8, p_x = 0.538, p_y = 0.455, p_size = 0.306, skew = 0.009
*** Added sample 9, p_x = 0.475, p_y = 0.836, p_size = 0.496, skew = 0.095
*** Added sample 10, p_x = 0.556, p_y = 0.588, p_size = 0.485, skew = 0.064
*** Added sample 11, p_x = 0.569, p_y = 0.419, p_size = 0.473, skew = 0.083
*** Added sample 12, p_x = 0.596, p_y = 0.525, p_size = 0.417, skew = 0.107
*** Added sample 13, p_x = 0.546, p_y = 0.262, p_size = 0.417, skew = 0.038
*** Added sample 14, p_x = 0.543, p_y = 0.029, p_size = 0.423, skew = 0.069
*** Added sample 15, p_x = 0.371, p_y = 0.075, p_size = 0.369, skew = 0.071
*** Added sample 16, p_x = 0.375, p_y = 0.181, p_size = 0.335, skew = 0.010
*** Added sample 17, p_x = 0.379, p_y = 0.385, p_size = 0.334, skew = 0.008
*** Added sample 18, p_x = 0.358, p_y = 0.635, p_size = 0.364, skew = 0.001
*** Added sample 19, p_x = 0.382, p_y = 0.872, p_size = 0.374, skew = 0.001
*** Added sample 20, p_x = 0.568, p_y = 0.729, p_size = 0.486, skew = 0.137
*** Added sample 21, p_x = 0.603, p_y = 0.558, p_size = 0.488, skew = 0.230
*** Added sample 22, p_x = 0.638, p_y = 0.430, p_size = 0.499, skew = 0.279
*** Added sample 23, p_x = 0.658, p_y = 0.702, p_size = 0.435, skew = 0.060
*** Added sample 24, p_x = 0.665, p_y = 0.623, p_size = 0.407, skew = 0.150
*** Added sample 25, p_x = 0.690, p_y = 0.577, p_size = 0.424, skew = 0.025
*** Added sample 26, p_x = 0.484, p_y = 0.469, p_size = 0.434, skew = 0.143
*** Added sample 27, p_x = 0.454, p_y = 0.540, p_size = 0.399, skew = 0.210
*** Added sample 28, p_x = 0.451, p_y = 0.703, p_size = 0.402, skew = 0.159
*** Added sample 29, p_x = 0.375, p_y = 0.474, p_size = 0.411, skew = 0.047
*** Added sample 30, p_x = 0.374, p_y = 0.679, p_size = 0.443, skew = 0.073
*** Added sample 31, p_x = 0.667, p_y = 0.513, p_size = 0.308, skew = 0.022
*** Added sample 32, p_x = 0.782, p_y = 0.424, p_size = 0.308, skew = 0.028
*** Added sample 33, p_x = 0.695, p_y = 0.318, p_size = 0.308, skew = 0.045
*** Added sample 34, p_x = 0.390, p_y = 0.655, p_size = 0.327, skew = 0.203
*** Added sample 35, p_x = 0.399, p_y = 0.707, p_size = 0.331, skew = 0.342
*** Added sample 36, p_x = 0.497, p_y = 0.605, p_size = 0.336, skew = 0.128
*** Added sample 37, p_x = 0.510, p_y = 0.707, p_size = 0.336, skew = 0.244
*** Added sample 38, p_x = 0.497, p_y = 0.546, p_size = 0.339, skew = 0.306
*** Added sample 39, p_x = 0.635, p_y = 0.678, p_size = 0.310, skew = 0.006
*** Added sample 40, p_x = 0.611, p_y = 0.846, p_size = 0.308, skew = 0.012
*** Added sample 41, p_x = 0.577, p_y = 0.204, p_size = 0.307, skew = 0.030
**** Calibrating ****
mono pinhole calibration...
D = [0.13708451678437922, -0.25401772231120406, 0.009488680435853903, 0.0024256349577669247, 0.0]
K = [1342.207453796947, 0.0, 965.9585846877721, 0.0, 1341.2992664435826, 587.960370520978, 0.0, 0.0, 1.0]
R = [1.0, 0.0, 0.0, 0.0, 1.0, 0.0, 0.0, 0.0, 1.0]
P = [1347.8486328125, 0.0, 971.9469484728761, 0.0, 0.0, 1364.8638916015625, 594.9367710060869, 0.0, 0.0, 0.0, 1.0, 0.0]
None
# oST version 5.0 parameters


[image]

width
1920

height
1080

[narrow_stereo]

camera matrix
1342.207454 0.000000 965.958585
0.000000 1341.299266 587.960371
0.000000 0.000000 1.000000

distortion
0.137085 -0.254018 0.009489 0.002426 0.000000

rectification
1.000000 0.000000 0.000000
0.000000 1.000000 0.000000
0.000000 0.000000 1.000000

projection
1347.848633 0.000000 971.946948 0.000000
0.000000 1364.863892 594.936771 0.000000
0.000000 0.000000 1.000000 0.000000
3、然后点击Save按钮,会把标定的文件信息保存到:/tmp/calibrationdata.tar.gz路径下
calibrationdata.tar.gz压缩文件中,会存储标定过程中的图片,还有就是标定的参数相机参数文件,如下: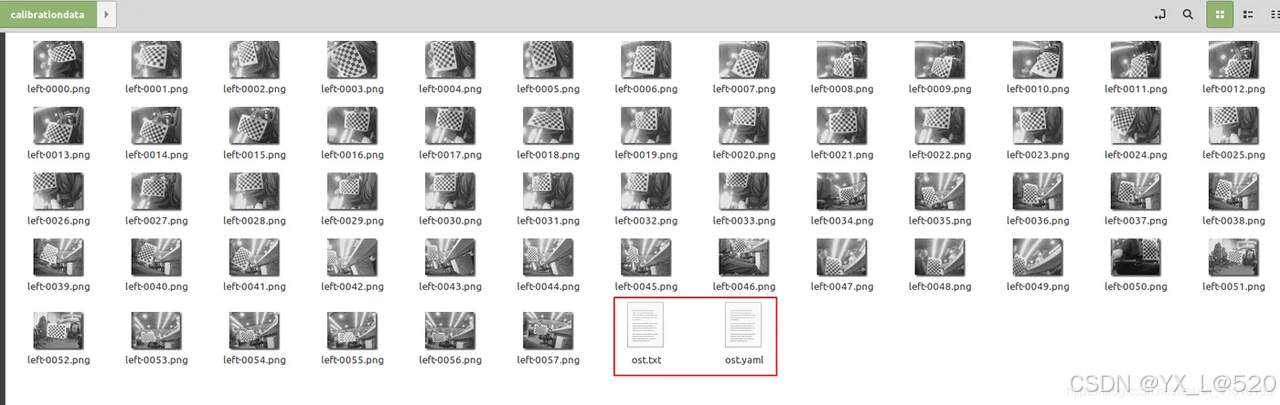
ost.txt文件内容:
# oST version 5.0 parameters


[image]

width
1920

height
1080

[narrow_stereo]

camera matrix
1346.337242 0.000000 973.784611
0.000000 1345.832807 554.702266
0.000000 0.000000 1.000000

distortion
0.145266 -0.265614 -0.000379 0.002002 0.000000

rectification
1.000000 0.000000 0.000000
0.000000 1.000000 0.000000
0.000000 0.000000 1.000000

projection
1353.022461 0.000000 979.819928 0.000000
0.000000 1373.117188 553.884378 0.000000
0.000000 0.000000 1.000000 0.000000ost.yaml文件内容:
2.3 所有结果与出厂参数对比汇总
| 来源 | fx | fy | cx | cy | k₁ | k₂ |
| 出厂 | 1354.44 | 1352.06 | 970.9 | 559.16 | 0 | 0 |
| 第一次 | 1311.47 | 1310.83 | 954.27 | 553.21 | 0.103 | −0.211 |
| 第二次 | 1349.42 | 1349.06 | 977.54 | 556.16 | 0.121 | −0.227 |
| 第三次 | 1303.3 | 1299.84 | 981.83 | 585.41 | 0.128 | −0.217 |
| 第四次 | 1347.47 | 1345.31 | 964.89 | 565.73 | 0.125 | −0.243 |
| 第五次 | 1346.34 | 1345.83 | 973.78 | 554.7 | 0.145 | −0.266 |
也可以用该方法标定红外深度摄像头
https://blog.csdn.net/hai411741962/article/details/133809244
参考
https://blog.csdn.net/xiaojiu1997/article/details/130607885
https://developer.aliyun.com/article/1599991
https://developer.aliyun.com/article/1592466

立足具身智能前沿赛道,致力于搭建全球化、开源化、全栈式技术交流与实践共创平台。
更多推荐
 8
8 0
0- 0


 已为社区贡献3条内容

所有评论(0)