ROS2 使用 UR 机械臂—— (1) 让机械臂动起来
ROS2 使用 UR 机械臂—— (1) 让机械臂动起来
目录:
参考:
环境:
- WSL2 Ubuntu 22.04
- ROS2 Humble
1. 安装 ur_robot_driver
两种方式:1. 二进制包安装 2. 源码编译
仓库地址:Universal_Robots_ROS2_Driver
1.1. 方式一:二进制包安装
- 安装 ROS2
- 安装 ur_robot_driver
sudo apt-get install ros-${ROS_DISTRO}-ur
安装后将能在
/opt/ros/humble/share中找到相应的包
1.2. 方式二:源码编译
- 安装 ROS2
- 安装
colcon和其拓展,以及vcs:sudo apt install python3-colcon-common-extensions python3-vcstool - 创建一个新的 ROS2 工作空间:
export COLCON_WS=~/workspace/ros_ur_driver mkdir -p $COLCON_WS/src - 克隆相关包(将 替换为 humility、iron 或 main 以进行滚动)、安装依赖项、编译并使用以下命令获取工作区:
cd $COLCON_WS
git clone -b <branch> https://github.com/UniversalRobots/Universal_Robots_ROS2_Driver.git src/Universal_Robots_ROS2_Driver
vcs import src --skip-existing --input src/Universal_Robots_ROS2_Driver/Universal_Robots_ROS2_Driver-not-released.${ROS_DISTRO}.repos
rosdep update
rosdep install --ignore-src --from-paths src -y
colcon build --cmake-args -DCMAKE_BUILD_TYPE=Release
source install/setup.bas
2. 设置机械臂
- 使用 UR 机械臂之前需要设置机械臂的 ip 地址,连接到 UR 机械臂并提取其校准信息。
- 使用 UR 机械臂之前需要在其控制面板上安装 URCap 插件, URCap 是 UR 机械臂的控制面- 板系统 PolyScope 的一个拓展程序,用于使用 ROS 从外部控制机械臂。仓库地址:Universal_Robots_ExternalControl_URCap
- 如果没有真实机械臂,可以使用 URSim 来模拟几乎真实的机械臂。
具体过程参考:
3. 使用
3.1. 启动文件说明
使用二进制包安装的 launch 文件位于 \opt\ros\humble\share\ur_robot_driver\launch 下:
/ur_robot_driver/launch/
    ├── test_forward_velocity_controller.launch.py
    ├── test_joint_trajectory_controller.launch.py
    ├── test_scaled_joint_trajectory_controller.launch.py
    ├── ur10e.launch.py
    ├── ur10.launch.py
    ├── ur12e.launch.py
    ├── ur15.launch.py
    ├── ur16e.launch.py
    ├── ur20.launch.py
    ├── ur30.launch.py
    ├── ur3e.launch.py
    ├── ur3.launch.py
    ├── ur5e.launch.py
    ├── ur5.launch.py
    ├── ur7e.launch.py
    ├── ur8long.launch.py
    ├── ur_control.launch.py
    └── ur_dashboard_client.launch.py
ur_control.launch.py用于启动 ros2_control 节点,包括硬件接口、联合状态广播器和控制器,如果使用真正的机器人,此启动文件还会启动dashboard_client。;ur_dashboard_client.launch.py用于启动 UR 机器人的仪表板客户端;- 以
test_开头的 launch 文件为测试文件; ur10e.launch.py、ur5e.launch.py等文件为不同型号的机械臂的预定义启动文件。
注意:
ur_control.launch.py用于全局启动,可设置更多参数,ur5e.launch.py等为预定义部分参数的启动文件,二者选其一即可。
这些启动文件需要启动参数,可以使用 ros2 launch ur_robot_driver <launch_file_name>.launch.py --show-args 列出启动文件 launch_file_name 的参数,例如:
username@ubuntu:~$ ros2 launch ur_robot_driver ur5.launch.py --show-args
Arguments (pass arguments as '<name>:=<value>'):

    'robot_ip':
        IP address by which the robot can be reached.

    'use_fake_hardware':
        Start robot with fake hardware mirroring command to its states.
        (default: 'false')

    'fake_sensor_commands':
        Enable fake command interfaces for sensors used for simple simulations. Used only if 'use_fake_hardware' parameter is true.
        (default: 'false')

    'initial_joint_controller':
        Initially loaded robot controller. Valid choices are:['scaled_joint_trajectory_controller', 'joint_trajectory_controller', 'forward_velocity_controller', 'forward_position_controller', 'freedrive_mode_controller', 'passthrough_trajectory_controller']
        (default: 'scaled_joint_trajectory_controller')

    'activate_joint_controller':
        Activate loaded joint controller.
        (default: 'true')
robot_ip机器人的 IP 地址,必填。use_fake_hardware是否使用 ros2_control 中的简单硬件模拟器。对于测试启动文件、描述等很有用。请参阅下面的说明。fake_sensor_commands是否启用为硬件模拟器设置传感器值。对于控制器的离线测试很有用。initial_joint_controller要启动的机器人关节的控制器。use_fake_hardware:=true时无法使用scaled_joint_trajectory_controller。
3.2. 使用启动文件
驱动程序有两种基本的操作模式:1.使用真实硬件或 URSim 模拟器;2.使用虚拟硬件(use_fake_hardware=true)。
1. 启动
- 要使用真实硬件或 URSim 模拟器进行测试,请使用:
或者ros2 launch ur_robot_driver ur_control.launch.py ur_type:=<UR_TYPE> robot_ip:=<IP_OF_THE_ROBOT> launch_rviz:=trueros2 launch ur_robot_driver <ur_type>.launch.py - 要使用虚拟硬件进行测试,请使用:
或者ros2 launch ur_robot_driver ur_control.launch.py ur_type:=<UR_TYPE> robot_ip:=yyy.yyy.yyy.yyy initial_joint_controller:=joint_trajectory_controller use_fake_hardware:=true launch_rviz:=trueros2 launch ur_robot_driver <ur_type>.launch.py robot_ip:=yyy.yyy.yyy.yyy initial_joint_controller:=joint_trajectory_controller use_fake_hardware:=true
2. 控制
通过在另一个终端中启动以下命令,将一些演示目标发送到对应的控制器:
ros2 launch ur_robot_driver test_scaled_joint_trajectory_controller.launch.py
# ros2 launch ur_robot_driver test_joint_trajectory_controller.launch.py
# ros2 launch ur_robot_driver test_forward_velocity_controller.launch.py
注意: 此处选用的控制器应当与启动参数
initial_joint_controller中的控制器一致。
此时 rviz 中的 UR 机器人模型应该会开始运动:
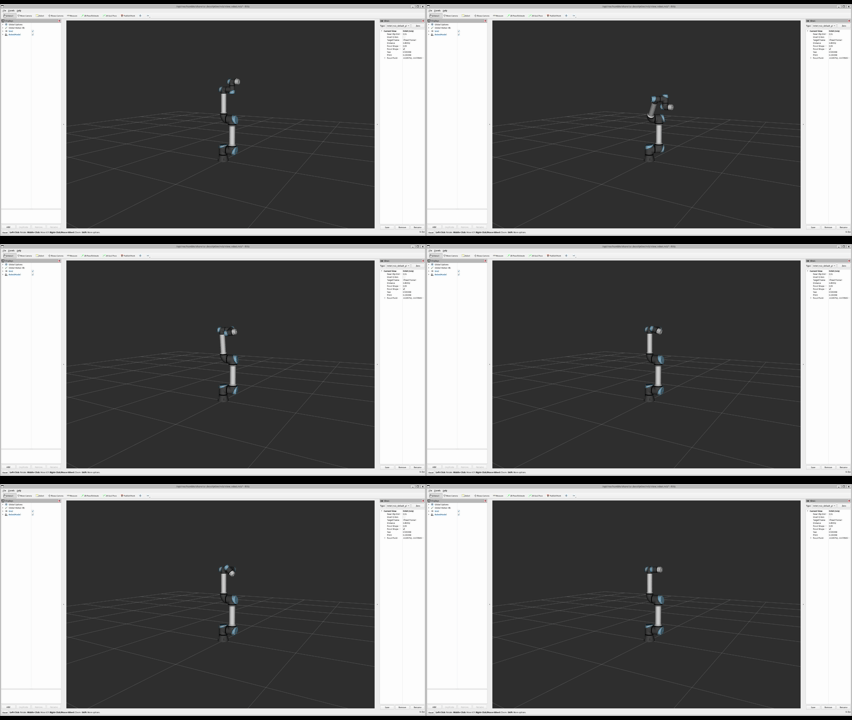
3. 使用 MoveIt
使用真实机械臂或者URSim时无需额外配置,但如果使用虚拟硬件(use_fake_hardware:=true),则使用 MoveIt 之前,需要修改 \opt\ros\humble\share\ur_moveit_config\config\controllers.yaml 文件,将 scaled_joint_trajectory_controller 的 default 的值改为 false ,将 joint_trajectory_controller 的 default 值改为 true ,修改后的配置文件如下:
controller_names:
  - scaled_joint_trajectory_controller
  - joint_trajectory_controller


scaled_joint_trajectory_controller:
  action_ns: follow_joint_trajectory
  type: FollowJointTrajectory
  default: false # true
  joints:
    - shoulder_pan_joint
    - shoulder_lift_joint
    - elbow_joint
    - wrist_1_joint
    - wrist_2_joint
    - wrist_3_joint


joint_trajectory_controller:
  action_ns: follow_joint_trajectory
  type: FollowJointTrajectory
  default: true # false
  joints:
    - shoulder_pan_joint
    - shoulder_lift_joint
    - elbow_joint
    - wrist_1_joint
    - wrist_2_joint
    - wrist_3_joint
随后启动 ur_control.launch.py 或者 <ur_type>.launch.py ,此时可将 rviz 关闭:
ros2 launch ur_robot_driver ur_control.launch.py ur_type:=ur5e robot_ip:=yyy.yyy.yyy.yyy use_fake_hardware:=true launch_rviz:=false initial_joint_controller:=joint_trajectory_controller
再新开一个终端启动 ur_moveit.launch.py ,并启动 rviz :
ros2 launch ur_moveit_config ur_moveit.launch.py ur_type:=ur5e launch_rviz:=true
启动 rviz 后,即可使用 moveit 进行规划和移动:
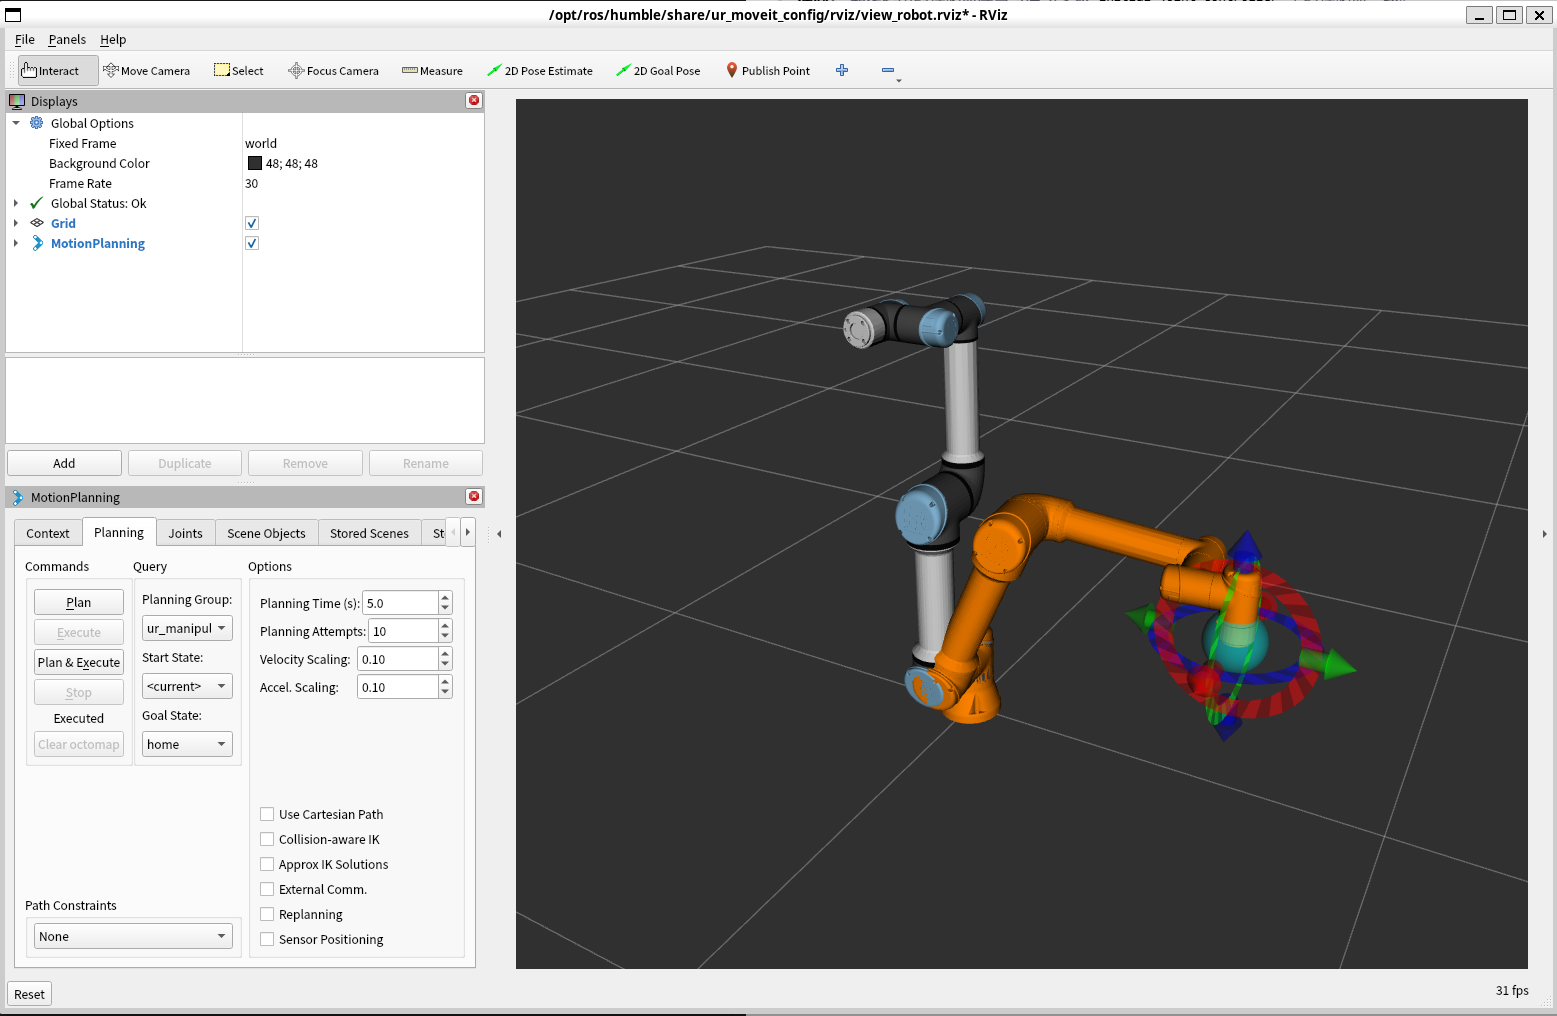
4. 使用代码
经过上述步骤可以通过 rviz 可视化机械臂,并使用 MoveIt 组件手动规划和执行,下面通过编写 C++ 代码调用 MoveIt 的 MoveGroupInterface 接口实现控制机械臂:
#include "rclcpp/rclcpp.hpp"
#include <moveit/move_group_interface/move_group_interface.h>
#include <moveit/planning_scene_interface/planning_scene_interface.h>

int main(int argc, char* argv[])
{
    // 初始化 ROS2 节点
    rclcpp::init(argc, argv);
    auto node = std::make_shared<rclcpp::Node>("ur_control");
    auto logger = node->get_logger();

    // 创建一个多线程执行器,MoveGroupInterface 需要它
    rclcpp::executors::MultiThreadedExecutor executor;
    executor.add_node(node);
    std::thread executor_thread([&executor]() { executor.spin(); });

    // 1. 创建 MoveIt MoveGroup Interface
    // 参数 "ur_manipulator" 必须与你在 MoveIt Setup Assistant 中配置的规划组名称一致
    moveit::planning_interface::MoveGroupInterface move_group(node, "ur_manipulator");
    // 设置规划时间、目标容差等参数(可选)
    move_group.setPlanningTime(10.0); // 秒
    move_group.setGoalTolerance(0.01); // 米

    // 2. 设置目标位姿
    geometry_msgs::msg::Pose target_pose;
    target_pose.orientation.w = 1.0; // 默认朝向
    target_pose.position.x = 0.3;    // 单位:米
    target_pose.position.y = 0.2;
    target_pose.position.z = 0.4;
    move_group.setPoseTarget(target_pose);

    // 3. 进行规划并移动到目标
    moveit::planning_interface::MoveGroupInterface::Plan my_plan;
    bool success = (move_group.plan(my_plan) == moveit::core::MoveItErrorCode::SUCCESS);

    if(success) {
    RCLCPP_INFO(logger, "规划成功,开始移动!");
    move_group.execute(my_plan);
    } else {
    RCLCPP_ERROR(logger, "规划失败!");
    }

    // 关闭 ROS2
    rclcpp::shutdown();
    executor_thread.join();
    return 0;
}
修改 CMakeLists.txt 文件,添加 moveit_ros_planning_interface 依赖项:
find_package(moveit_ros_planning_interface REQUIRED)

ament_target_dependencies(move_to_pose
  rclcpp
  moveit_ros_planning_interface
)
编译并启动,可在 Rviz 中查看机器人运动:
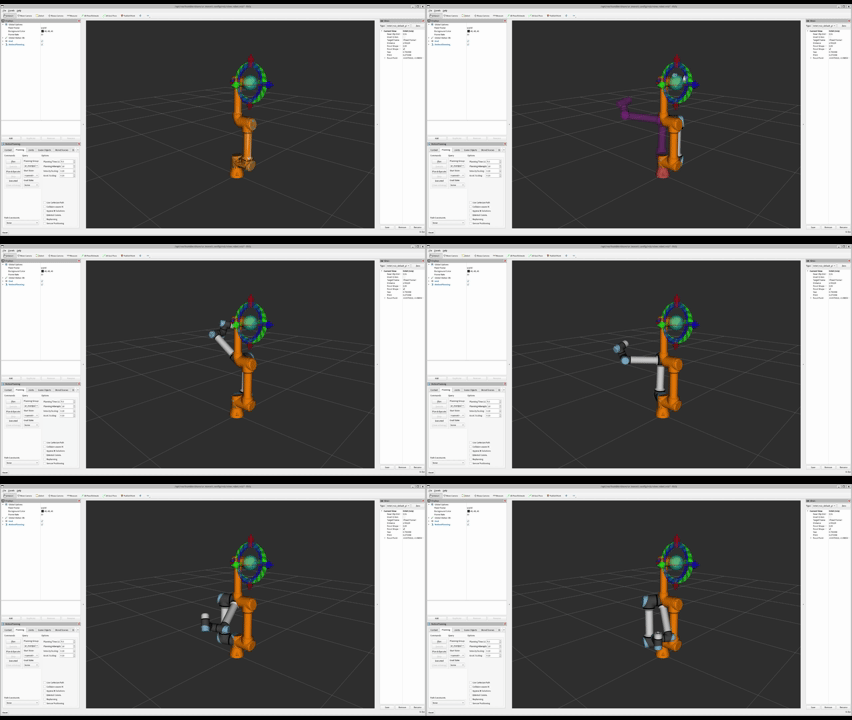

立足具身智能前沿赛道,致力于搭建全球化、开源化、全栈式技术交流与实践共创平台。
更多推荐
 32
32 0
0- 0


 已为社区贡献1条内容

所有评论(0)